
In 15 years of fixing computers, I had never seen a charge controller fail from air alone. Then I moved to Miami.
South Florida’s humidity doesn’t need a spilled drink or a rainstorm to get inside your laptop. Moisture enters through the ventilation openings every single day — silently, naturally, without anyone noticing. It settles on the board, causes micro-corrosion on tiny components, and one day your device is plugged in but not charging. No warning. No visible damage. Just a dead charging circuit.
The Problem: Plugged In, But Not Charging
A client brought in a laptop that was plugged in but wouldn’t charge. The power adapter was connected, the LED on the cord was lit, but the battery sat at 12% and kept dropping.
He had already tried what most people try first. Swapped the charging cable. Tested a different wall outlet. Even bought a replacement charger, thinking the original one died. Nothing changed — the battery kept draining while the laptop was plugged in.
The machine itself was running fine. No screen issues, no overheating, no software problems. It powered on normally from the AC adapter, and every other component seemed to work. But the moment you unplugged the power cord, it would shut down within minutes.
Here’s what made this case unusual: there was no spill. No water damage anyone could remember. No drop, no crack, no obvious reason for the failure. The laptop just stopped charging one day — and that’s exactly the pattern I keep seeing in Miami. The device works perfectly until it doesn’t, and the owner has no idea why.
Most people assume it’s the battery going bad. Some think the charging port is broken. A few blame a faulty driver or a software glitch. In this case, it was none of those things.
The Diagnosis: A Charging Problem That Started Inside the Laptop
The charging problem was deeper than the battery, the charging port, or the adapter. Finding that took a process of elimination.
- First step: rule out the obvious. The client had already tried the things most people try first — a different charging cable, a different wall outlet, even a replacement charger. Nothing changed. The laptop was still plugged in but not charging, and the battery kept draining while connected to power.
That mattered. It made a simple charger or power cord problem much less likely.
The machine itself gave the next clue. It still powered on normally from the AC adapter, and everything else seemed to work the way it should. No screen issues. No overheating. No obvious software problems. But the moment the power cord was disconnected, the laptop could not stay alive for long.
That narrowed it down. The laptop could still see outside power, but it was not handling charging properly. At that point, the problem no longer looked like a bad battery, a worn charging port, or a faulty driver. It was starting to look like something deeper in the charging circuit or power section of the motherboard.
I had a pretty good idea where the fault was, but not the exact failed point on the board. And that distinction matters. In real laptop repair, you do not always need to know the exact chip before you know what level of repair you are dealing with.
This is the part a lot of people miss. They keep swapping the charger, blaming the battery, or trying a driver update in Device Manager. Some even reset the system management controller or chase random software fixes. But when a laptop still reacts to the adapter and still will not charge the battery, the problem is often already on the board.
That was the working diagnosis here: not a basic accessory issue, but a board-level charging fault somewhere in the motherboard. That is why the next step was not another replacement charger. It was a repair attempt at the chip level.
The Solution: A Chip-Level Repair Was Tried First, But It Wasn’t Enough
The final fix was not a new charger or a battery replacement. The issue was already in the charging and power section of the motherboard, so the first real laptop repair step was a chip-level attempt — and when that did not solve it, the only practical fix was replacing the board.
Not every board-level laptop problem ends with one bad chip. Sometimes that is the right place to start. Sometimes it is not enough. In this case, the repair had to move one step further.
Here’s exactly how this laptop not charging repair moved forward, step by step.
Step 1. Rule Out the Outside Causes
By this point, the obvious things were already off the table. The client had tried a different charging cable, a different wall outlet, and even a replacement charger. The laptop would still power on from the AC adapter, but the battery kept draining instead of charging.
Step 2. Try The Least Invasive Board-Level Fix First
Once it was clear this was deeper than a bad charging port or a dying battery, the next logical step was a chip-level repair attempt. I do not take on that kind of micro-soldering work myself, so I sent the board out to a shop to try replacing the charge controller.
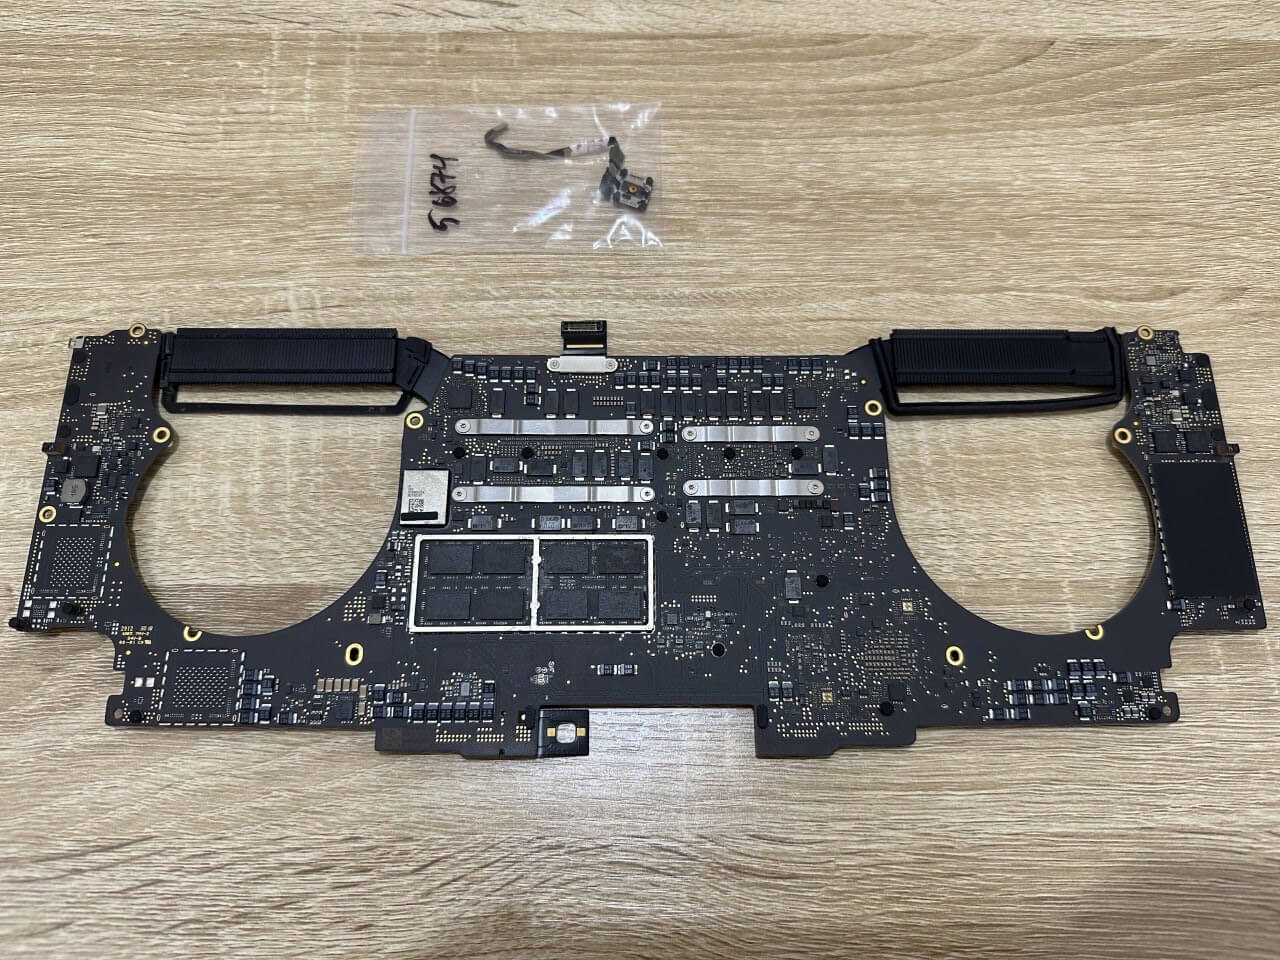
Step 3. Re-Test The Laptop After the Chip Repair
The board came back, the machine was reassembled, and I tested it again. The result was the same: the laptop battery was still not charging properly. At that point, it was clear the problem was not limited to one small repairable point in the charging circuit.
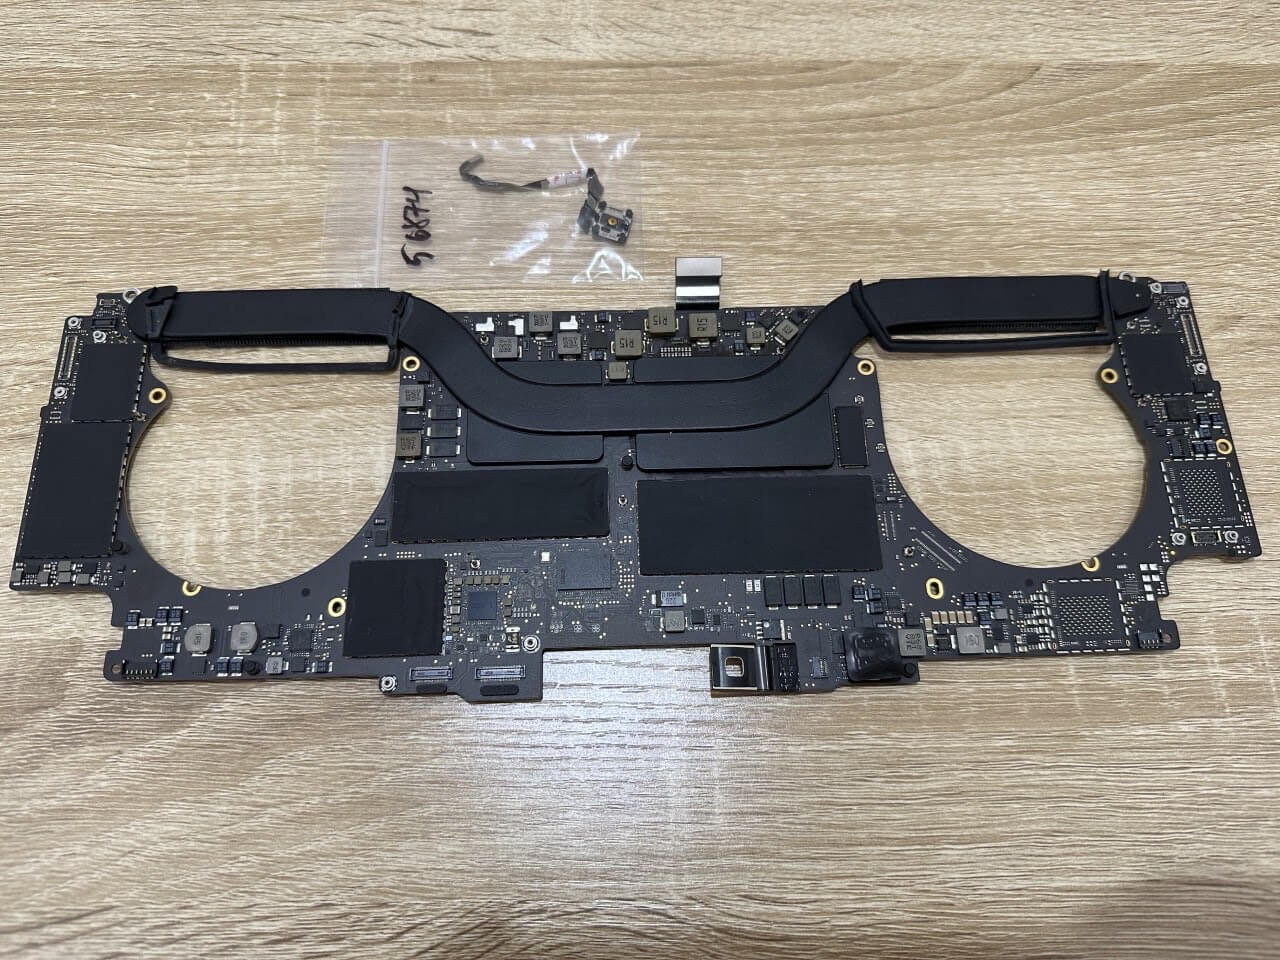
Step 4. Replace The Motherboard
Once the chip-level attempt failed, the next step was the one that actually made sense: replace the motherboard. I bought a replacement board and installed it, because continuing to chase the fault at component level would have meant more time, more cost, and no guarantee of a real fix.
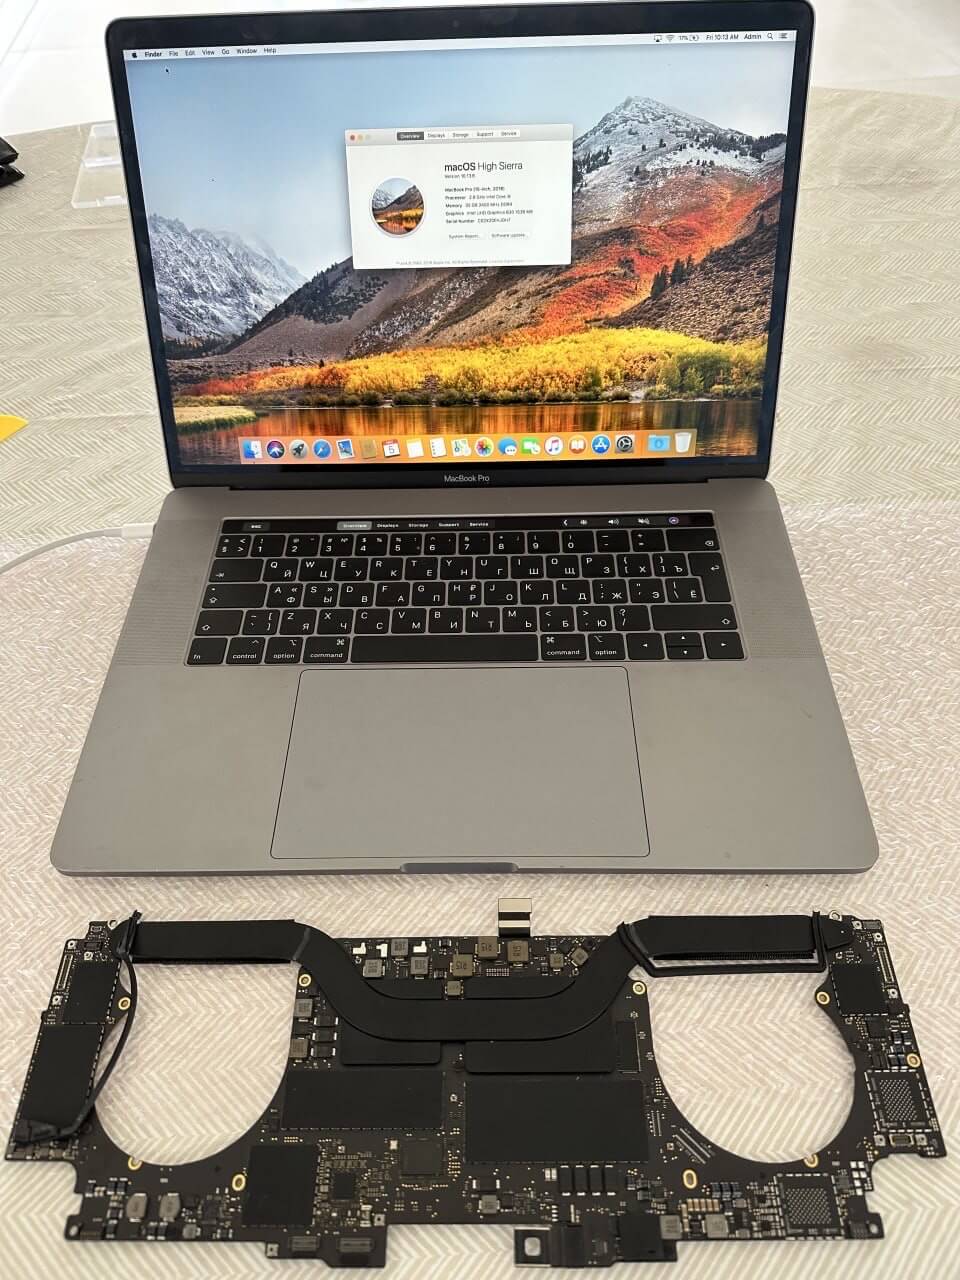
Step 5. Test The Final Repair
After the board replacement, the difference was immediate. The battery percentage started climbing immediately — from 12% to full over a couple of hours. Then I unplugged the power cord. The laptop kept running. No shutdowns, no drops. The fix held.
A week later I followed up with the client. The device was charging normally, holding a full battery life cycle, and working properly on both AC and battery power.
The whole laptop not charging repair ended up taking more than one step: diagnostics first, then a chip-level repair attempt that didn’t solve the issue, and finally a full motherboard replacement. The final cost was still far less than buying a new laptop. But fixing the hardware was only half the job. If nothing changes about how this device lives in Miami’s climate, the same kind of damage can come back. That’s why the next part matters more than the repair itself.
Why This Happens in Miami
Miami is hard on laptops for one simple reason: the problem is usually not humidity by itself, but humidity plus condensation plus coastal air.
Average humidity in South Florida stays between 70% and 80% year-round, pushing above 90% during the rainy season from June through October.
Every time your laptop’s fans spin, they pull that warm, humid air through the ventilation openings and across the board. When moisture hits cooler components inside — the charge controller, voltage regulators, capacitors — condensation forms. Not a visible droplet. A microscopic film that sits on metal contacts and solder joints, day after day, building up corrosion until something shorts.
Laptop makers typically rate their machines for non-condensing humidity, not for moisture forming inside the device.
- Apple lists up to 95% relative humidity, noncondensing for Mac laptops
- Dell lists 10% to 80% relative humidity, noncondensing in operation for one Latitude model.
That last part matters. Once moisture actually settles where it should not, the risk changes fast.
And then there’s salt. Miami is a coastal city, and ocean air carries salt particles that accelerate corrosion dramatically. Love working on your balcony with that ocean view? Your device is absorbing salt-laden moisture with every breeze.
This doesn’t just affect laptops. I’ve seen the same damage pattern in game consoles, docking stations, and networking gear — anything with a fan or vent slot that lives in a humid space. But laptops get hit hardest because people carry them between air-conditioned rooms and hot, humid patios. Those temperature swings create even more condensation inside.
How to Protect Your Laptop in Miami’s Climate
Humidity damage is slow and invisible, but a few simple habits can keep your electronics safe for years — even in South Florida. Most of the laptop repairs I do here could have been prevented.
Keep your laptop in an air-conditioned room.
AC pulls moisture out of the air, keeping humidity around 40–50%. That’s the safe range. The moment your device moves to an unconditioned space — a garage, a patio, a storage room — it’s exposed.
Add a dehumidifier if your AC isn’t enough.
Especially during the rainy season from June through October, even well-sealed apartments can climb above 70% indoors.
Don’t work outside regularly.
A balcony with an ocean view is beautiful — and terrible for your laptop. The fans pull in salt air and moisture directly onto the board. Once in a while won’t kill it. Every day will.
Never store your laptop in a closed bag in a humid room.
A sealed sleeve traps warm air inside and creates condensation faster than open air would.
Schedule a preventive cleaning every six months.
Opening the laptop and blowing out dust with compressed air takes 30 minutes. It can catch corrosion before it shorts a component — like an oil change for your device.
Act fast when charging gets inconsistent.
If your laptop says it’s plugged in but the battery isn’t charging, or the percentage drops while connected, don’t wait. That can be an early sign of damage somewhere in the charging or power area of the motherboard, and it usually gets worse if you wait.
Need Help with Your Laptop?
If your laptop is plugged in and not charging (or behaving in any way that feels off), reach out. I’ll diagnose the issue, explain what’s going on, and give you a clear plan before any work begins.
